
How to Post Your Event on Safety Harbor Connect

Wondering how you can post and promote your own local events on Connect? You’re in the right spot!
First, you will need to sign in to your Connect account.
You must be registered on this site to post an event. If you do not already have a Connect account, please register by following these instructions: Register/Create Profile
After you have logged on, simply move your cursor up to the black toolbar at the top of your browser. Hover your cursor over the “Events” tab and you will see a drop down list to choose from. Click on “Community: Submit Event”. Click on the image below to see an example:

The Submit An Event Page will open and show you data fields to enter your Event’s information. See example in image below:
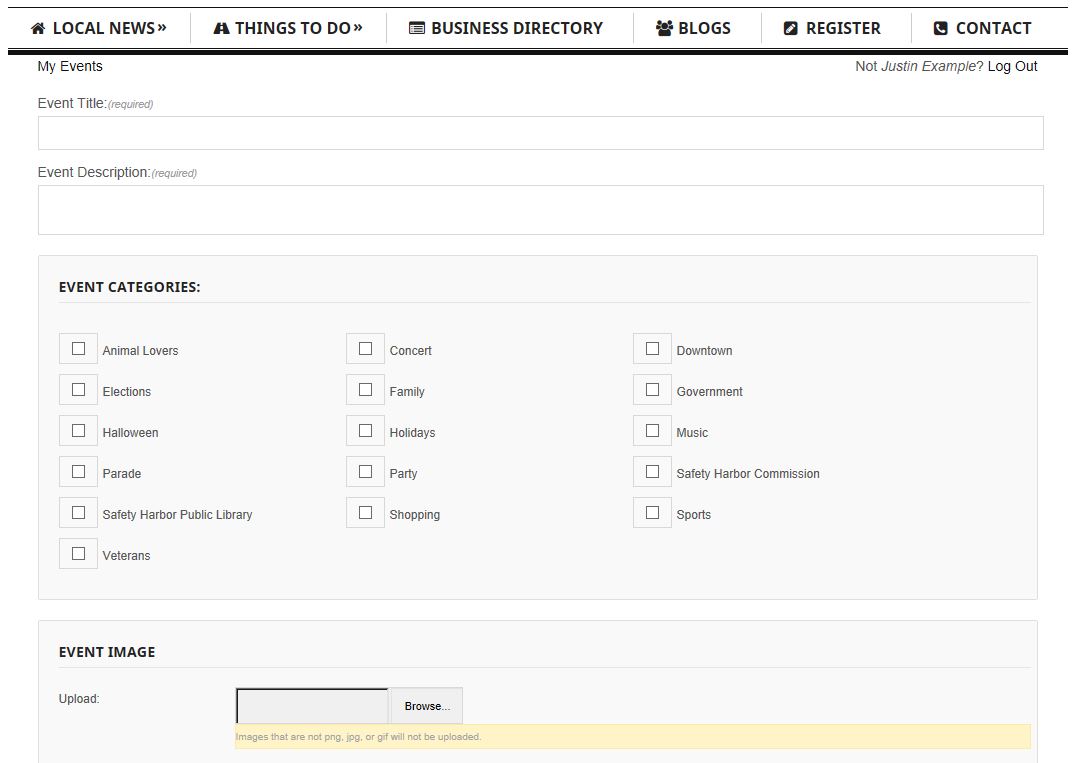
- The Event Title and Description are required fields
- The Event Category is not necessary, so if you don’t see a category that fits your event, simply skip this section
- Upload an Event Image so that your event gets noticed! Please keep file sizes less than 300 pixels wide
- Once you begin configuring event details, the first thing you’ll need to decide is whether or not this will be an all day event. If it is, hit the check-box; you’ll see the start/end time fields disappear upon doing so. If it isn’t an all-day event, leave this field unchanged
- DO NOT use the “Recurrence” option, doing so may result in your event submission not being approved. You can submit a special request through the Contact Us page if you want to ask for special permission to post “recurring events”
- Select the start date/time; start date will default to today and start time/end time will default to 8 a.m. / 5 p.m. respectively. However — assuming you haven’t set this event as all day — you can change these to whatever fits your event criteria using the drop-downs.
- Event Location Details will determine the venue for your event. You can either use a saved venue from the dropdown or create a new one on the spot. If you do create a new one now, it’ll be saved in the dropdown for use on any future event you create. It’s also worth noting that you can add as many or as few venue details as you see fit; keep in mind that your venue will also need to be approved, so check to make sure it’s not already on the list so that your not creating duplicates. You can also leave these fields entirely blank if you don’t want any venue information to display. However, you will need a full address if you want to make use of the Google Maps options, Map View, and/or Location Search
- If you check the “Show Google Maps Link” box, it will include a nice button that links your readers to view the venue information at maps.google.com. If you check the “Show Google Maps” box, it will embed a map of the venue into the events page directly.
- Event Organizer Details are similar to the venue details we added above, only these focus on the person putting the event together. YOU MUST BE THE EVENT ORGANIZER or have written permission from the Event Organizer to publish Events on Safety Harbor Connect. Once again you have the option to pick from existing organizers via the drop-down (for repeat organizers) or to add a new one using the fields available (for first time organizers); and once again, you can add as many or as few organizer details about you or your organization, as you wish.
- Event Website allows you to enter a URL if the event itself has a separate website. Otherwise you can leave it blank.
- The Event Cost options allow you to set a cost for the event. The next field, Cost, is how much your users can expect to pay for the event. If you leave it blank, no cost field will appear. If you enter a “0”, it will say the cost is “Free”. Otherwise just enter the numeric value you deem appropriate.
- REMEMBER TO CLICK THE “SUBMIT” BUTTON!
After you have submitted your event for approval, it might take a few days before it is posted publicly, so post your events well in advance! Our staff here is mighty but small 🙂 so the more thorough and complete you can be when posting, the better! In order to protect the integrity and value of Safety Harbor Connect, we ask that you edit or remove your events whenever a schedule change happens. If we find that the information you are posting is not correct or being kept up to date, you may lose posting privileges. If you are not the actual event organizer, or an associate working on behalf of an organization or another individual, please submit your requests for approval on our Contact page. Thanks for reading Safety Harbor Connect and contributing to our fun little city!